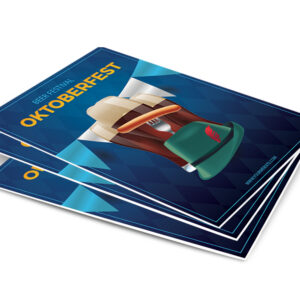
Description
Retractable Banners with Display are used anywhere you would like to display large format freestanding graphics. They are most often used where portability is a key consideration, such as at trade shows, seminars, and presentations. Retractable Banners with Display are also a good idea if you would like to move them around within your business environment. Consider using them for storefront displays to showcase a new product or special. Our Banners exhibit a wide color gamut, so they are great for colorful graphics. Banner Display stands are designed so that the Banner retracts into the base and can be changed.
This 33″ wide banner display stand is lightweight and portable. Features include a telescopic pole that allows adjustable banner height between 64″ and 80″. When not in use, your Banner is stored inside the anodized aluminum casing which fits easily into the travel bag (included).
Artwork Setup
In order to ensure your files are print-ready, we recommend that you upload them in PDF format. When you generate a print-ready PDF, your computer will use the settings in Adobe Acrobat Distiller or any other PDF generating programs you may use. Please make sure that these are set properly before generating your PDF file.
If you are uploading PDF files created in Photoshop, please be sure all layers are flattened.
We also accept .JPG (JPEG), .EPS and .TIF (TIFF) file types, however PDF is the preferred format.
Check your file to make sure it meets our file creation guidelines. This will help speed up the production of your project and give your printed piece the best results.
- Use the CMYK colorspace (Cyan, Magenta, Yellow, blacK). These are industry standard printing colors. CMYK colors are different than RGB (Red, Green, Blue), which are used to display colors on your screen.
- Use a minimum resolution of 300 dpi for image files.
- Specify trim area with crop marks. (Don’t place crop marks inside the work area.)
- Artwork should have 1/8″ (0.125″) bleed extending past the trim line. This is to prevent minor cutting variations from leaving unintended results at the trim edge.
- Safe Area is the 1/8″ (0.125″) area inside the trim line. Do not put critical information or images within the Safe Area. This is to prevent minor cutting variations from leaving unintended results at the trim edge.
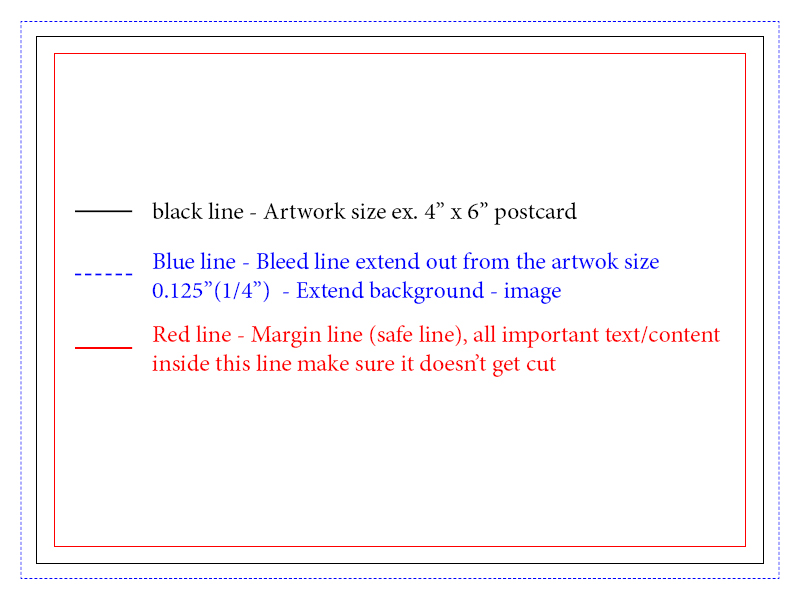
- If you want printed borders, they must be placed a minimum of 1/8″ (0.125″) inside the trim line and include bleed. This is to prevent minor cutting variations from leaving unintended results at the trim edge.